 Loading
SightSpace Pro has reached end-of-life. Read More
 Loading
SightSpace Pro is a mobile tool for Apple and Android (phones and tablets) that uses Virtual and Augmented Reality technology to visualize 3D digital models to scale, in the real world, and in real time. Sign up now for a free 24 hour trial of all features!
The default mode is a 3D model viewer. Incorporating the intuitive controls of the device, utilize a single finger to orbit around the model, a double finger swipe to pan, and two fingers to pinch zoom in and out. A double tap will reset the view.
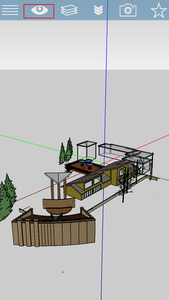
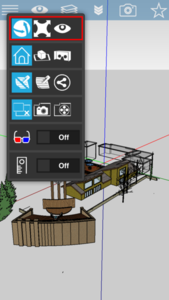
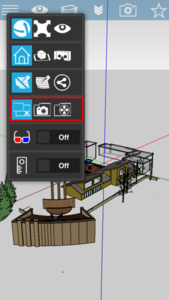
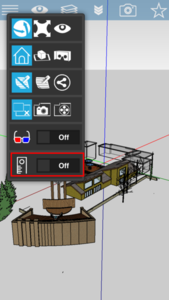
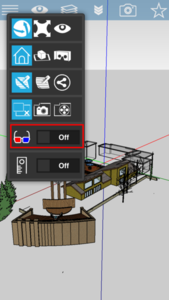
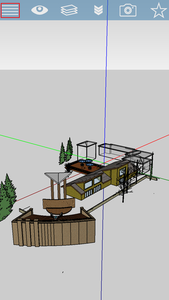
Load models onto your device by selecting the Action icon in the Upper Left. Tap on "Recent Models" and then choose from Device Models (models loaded onto your device via iTunes for Apple or stored on your SD Card for Android), SightSpace Pro Cloud, Dropbox, Google Drive, OneDrive, box, or the 3D Warehouse (the repository for Trimble SketchUp models). You can also load models via email (tap on the attachment -> Open in SightSpace) or by scanning a SightSpace Share Code (Action Icon -> QR Code Icon (Leftmost icon)).
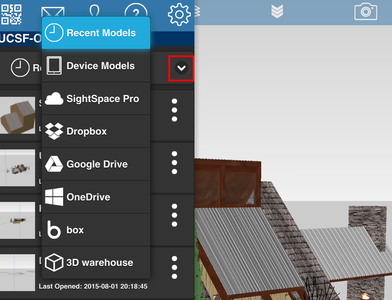
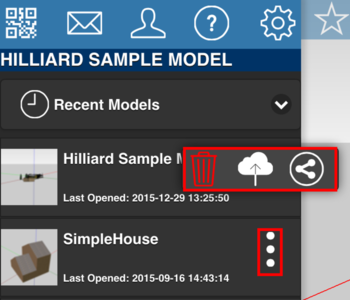
By logging into your SightSpace account, you have access to the SightSpace Cloud. It has unlimited storage for your 3D models and you can upload and download via the mobile app or via the website. In the app, select "Action Icon -> Recent Models -> SightSpace Pro" to download a model to your device. To upload a model, select the "More" icon of 3 dots next to your model and tap on the Cloud icon.
Action Menu -> Recent Models -> More (3 Dots)
In Augmented Reality mode, the model is positioned in physical space and viewed through the device camera.
If you are not located near the model, you are prompted for a location by receiving a top-down view of the active model and tapping a location (pinch-zoom and single-finger pan to move to desired locale).
Touch controls in AR mode:
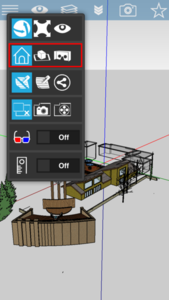
Additional options for AR mode include:
Connect an external GPS via wifi (or Blutetooth for Android devices) to increase accuracy or use Augmented Reality markers to position a model without internet connectivity. SightSpace works with professional GPS units including Trimble SPS985 or SPS585.
Share Codes can be used to both easily share a model in Augmented Reality or to provide accurate location information to a model that is not geo-located.
You create a SightSpace Share Code and email it to your client or collaborator. When the recepient scans it, the code will automatically detect if they are using an Apple or Android device and download SightSpace Pro. SightSpace Pro is free to use for anyone scanning a share code. Your model will be overlaid onto the code in read-only format and any associated project data will be displayed.
There are two ways to create a code for sharing:
Within the SightSpace Pro mobile app, upload your model to the SightSpace Cloud and create a Share Code. Send the code using email. Action Menu -> Recent Models -> More (3 dots) -> Share -> Select Display Options.
Login to the SightSpace Pro website, upload your model, choose display settings and add associated metadata, and create a Share Code.
Display Settings
Choose from the following options for display of your model:
Anywhere you place a Share Code, a user can scan it and have an interactive experience with your digital data.
Augmented Reality (AR) superimposes a virtual 3D model onto the real world. To ensure on-site accuracy, check the following:
Please note that some magnetic cases can affect the accuracy of your device. If you continue to experience problems, remove your case.
Pair your tablet or smartphone (Apple or Android) with your Google Cardboard for a Virtual Reality experience. Learn more about Google Cardboard (cost is about $20)

Tap on the Layer icon on the top bar. Select Layers to turn on/off.
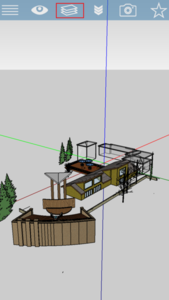
Bookmarks save a favorite view for fast retrievel. To set a Bookmark, tap the Star icon on toolbar to add a bookmark of the current model view. To view all current model bookmarks, tap on the drop down arrows from the top bar to expand the menu and tap on the star. Tapping on any of the displayed bookmarks will set the model view. To delete bookmark, tap on More -> Trashcan and select the bookmark to delete. Bookmarks are associated with the active model. Play all bookmarks for a quick and easy animation by selecting Expand Menu -> Bookmarks (Star) -> More -> Play All.
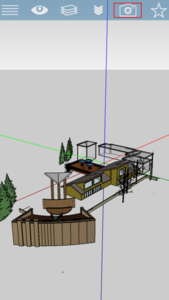
The Camera button takes a photo of what is currently displayed on the screen. These images are stored in the top bar Expand -> Photos (Camera Icon) and are associated with the model photographed. An image can be shared by selecting Photos, choosing the desired photo, and selecting Email Photo under the Action button. Photos may also be Printed or Saved to the Photo Album, also under the Action button. They can also be Annotated.
To place a note on the current model, tap a location and type. Previously placed notes appear while in Notes view with a yellow bubble.
Share notes by tapping on the note and selecting Email note from the Action button. Notes are emailed with a picture of the note location on the model.
Delete notes by tapping on the note and selecting Delete note from the Action button.
Export all notes as a PDF and share with colleagues

Photos displays images taken with the Camera button. Photo Actions include the option to Email Photo by selecting the desired image, selecting Email Photo, and emailing the recipient. Print and Save to Photo Album are also available. Select Slideshow to enable a slideshow of all pictures associated with the model. Single finger swipe to move through pictures. Click on the Trashcan to delete the selected photo. Photos can also be Annotated.

Markup photos with freehand drawings by drawing on the screen. Add Text and Share with colleagues.
Configure various model loading options for tuning performance and memory usage under Settings (Gear Icon). These options include the following:
Connect an external GPS via wifi (or Blutetooth for Android devices) to increase accuracy or use Augmented Reality markers to position a model without internet connectivity. SightSpace works with professional GPS units including Trimble SPS985 or SPS585.

You create a SightSpace Share Code and email it to your client or collaborator. Alternatively, you can also use a Share Code to have complete control over the appearance of your model when the code is scanned. Share Codes can be used for the following: 1) display of very small models (e.g. a chair) to maximize Augmented Reality accuracy; or 2) to choose the model location (use with GPS coordinates or when the model lacks geo-location information); or 3) to choose the scale of a model as displayed in Augmented Realty.
When a recepient scans the code with their mobile device, the code will automatically detect if they are using an Apple or Android device and download SightSpace Pro. SightSpace Pro is free to use for anyone scanning a share code. Your model will be overlaid onto the code in read-only format and any associated project data will be displayed.
There are two ways to create a code for sharing:
Within the SightSpace Pro mobile app, upload your model to the SightSpace Cloud and create a Share Code. Send the code using email. Action Menu -> Recent Models -> More (3 dots) -> Share -> Select Display Options.
Login to the SightSpace Pro website, upload your model, choose display settings and add associated metadata, and create a Share Code.
Display Settings
Choose from the following options for display of your model:
Anywhere you place a Share Code, a user can scan it and have an interactive experience with your digital data. Place them on marketing materials, blueprints, website, and more.
If you receive a recurrent memory message or an error, try the following: